You may not always see them, but pests have a way of making their presence known at the worst possible time. A trail of ants across the counter, a scratching sound behind the wall, or signs of damage in hidden corners can quickly turn a comfortable home into a source of stress. These issues often start small but can grow into larger problems if left unaddressed. Pest control plays a crucial role in protecting both your home and your well being.
Pest control is more than just eliminating unwanted insects or animals. It is a structured approach to preventing infestations, managing risks, and maintaining a clean and safe environment. Understanding how pest control works can help you take the right steps to keep your space protected. Go to this website at https://www.benspest.biz/ for more information about pest control.
Understanding What Pest Control Means
Pest control refers to the process of managing and eliminating unwanted organisms that can harm property, health, or comfort. These pests can include insects, rodents, and other creatures that invade living or working spaces.
The goal of pest control is not only to remove existing infestations but also to prevent future problems. This involves identifying the source of the issue and implementing strategies to reduce the chances of pests returning.
Pest control methods can vary depending on the type of pest and the severity of the infestation. Some situations require immediate treatment, while others benefit from long term prevention plans.
By understanding the nature of pest control, it becomes easier to maintain a safe and pest free environment.
Common Types of Household Pests
Different types of pests can affect homes in various ways. Insects such as ants, cockroaches, and termites are among the most common. They can contaminate food, damage structures, and spread bacteria.
Rodents such as mice and rats are also a frequent concern. They can chew through materials, create nests in hidden areas, and pose health risks.
Other pests may include mosquitoes, bed bugs, and spiders. Each type of pest requires a specific approach to control and prevention.
Recognizing the signs of these pests is the first step in addressing the problem effectively. Early detection can prevent small issues from becoming more serious.
The Pest Control Process
The pest control process typically begins with an inspection. This step involves identifying the type of pest, the extent of the infestation, and the areas affected.
Once the problem is understood, a treatment plan is developed. This plan may include the use of traps, baits, or targeted treatments designed to eliminate the pests.
After treatment, follow up steps are often taken to ensure that the infestation has been fully addressed. This may involve monitoring the area and making adjustments if necessary.
Prevention is a key part of the process. Sealing entry points, improving sanitation, and reducing attractants help keep pests from returning.
A structured approach ensures that pest control is both effective and long lasting.
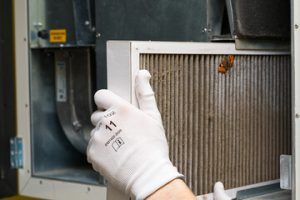
Benefits of Professional Pest Control Services
While some pest issues can be managed with basic methods, professional pest control services offer several advantages. One of the main benefits is expertise. Professionals understand pest behavior and know how to address infestations effectively.
They also use specialized tools and treatments that are not always available to the general public. This allows for more efficient and targeted solutions.
Safety is another important factor. Professionals are trained to use treatments in a way that minimizes risk to people and pets.
Time savings is also significant. Dealing with pests can be time consuming, and professional services allow you to resolve the issue more quickly.
These benefits make professional pest control a reliable option for managing infestations.
Preventive Pest Control Measures
Prevention is one of the most effective ways to manage pests. Taking proactive steps can reduce the likelihood of infestations and maintain a clean environment.
Keeping your home clean and free of food debris helps eliminate attractants. Proper storage of food and regular cleaning can make a significant difference.
Sealing cracks and openings prevents pests from entering. This includes checking doors, windows, and other potential entry points.
Managing moisture is also important. Many pests are attracted to damp environments, so fixing leaks and improving ventilation can help.
Regular inspections allow you to identify potential issues before they become serious. Preventive measures are a key part of long term pest control.
Environmental Considerations in Pest Control
Modern pest control methods often focus on minimizing environmental impact. This includes using targeted treatments that reduce the use of chemicals while still being effective.
Integrated pest management is a common approach that combines different strategies to control pests in a balanced way. It focuses on prevention, monitoring, and careful use of treatments.
Eco friendly options are also available for those who prefer more sustainable solutions. These methods aim to protect both the environment and the health of occupants.
By considering environmental factors, pest control can be both effective and responsible.
When to Seek Pest Control Services
Knowing when to seek pest control services is important for addressing problems early. Signs such as droppings, damage, or unusual activity often indicate the presence of pests.
If an infestation becomes difficult to manage or continues to return, professional help may be necessary. Persistent issues often require more advanced solutions.
Seasonal changes can also influence pest activity. Being aware of these patterns helps you take preventive action at the right time.
Acting quickly when signs appear helps prevent further damage and ensures a more effective outcome.
Maintaining a Pest Free Environment
Maintaining a pest free environment requires ongoing attention. Regular cleaning, proper storage, and routine inspections all contribute to long term success.
Addressing small issues promptly prevents them from developing into larger problems. Consistency is key to keeping pests under control.
Combining preventive measures with professional support when needed creates a comprehensive approach to pest management.
With the right strategies, it is possible to maintain a space that is both comfortable and protected.
Final Thoughts
Pest control is an essential part of maintaining a safe and healthy living environment. It goes beyond eliminating unwanted pests and focuses on prevention, protection, and long term management.
By understanding how pest control works and taking proactive steps, you can reduce the risk of infestations and protect your home from potential damage. Whether through regular maintenance or professional services, effective pest control ensures that your space remains clean, comfortable, and secure.
In the end, a pest free home is not just about comfort. It is about creating an environment where you can live with confidence, knowing that your space is well cared for and protected from unwanted intruders.